
Winning a client does not finish the sales process. It starts a new handoff.
The agreement needs a signature. The first payment must be confirmed. Someone has to collect the right details and documents, prepare the work, schedule the kickoff, and tell the client what happens next.
In a small service business, those steps often live across email, payment notifications, shared folders, forms, and one person's memory. Client onboarding automation connects them into a visible workflow. It does not require an enterprise platform or an impersonal sequence of messages.
If your current problem is getting inquiries into a reliable follow-up process, start with this guide to small business workflow automation. The workflow below begins later, when a prospect has agreed to become a client.
Define one clear start and finish
Choose a start event that means the sale is real. Depending on the business, that might be:
- An agreement signed
- A deposit or first invoice paid
- A proposal accepted and approved by the owner
Do not start the full onboarding workflow when someone merely asks for a quote. That creates client folders, tasks, and reminders for work that may never begin.
The finish should be equally clear. A useful definition is: the client has submitted the required information, the team has reviewed it, an owner is assigned, and the kickoff or first delivery step is scheduled.
Between those points, track a small set of statuses such as Waiting for agreement, Waiting for payment, Intake sent, Documents missing, Ready for review, and Kickoff booked. Each status should tell the team what happens next.
Build the workflow around one client record
Create one client row or card that holds the information the team checks every day:
- Client name and primary contact
- Service or package purchased
- Agreement status
- Payment status
- Intake status
- Required documents and missing items
- Internal owner
- Next action and due date
- Kickoff date
- Notes that affect delivery
A lightweight CRM, project board, or carefully designed spreadsheet can hold this record. Pick the simplest option your team will actually update. The record is the control point; the agreement tool, payment provider, form, and shared folder can remain separate.
Connect the six onboarding handoffs
1. Confirm agreement and payment
Treat agreement and payment as separate checks. A signed agreement does not prove that payment cleared, and a payment without an accepted scope may still need attention.
When both conditions are met, update the client record and create the onboarding project. If either remains incomplete, keep the record in the correct waiting status and assign the next follow-up date. This is safer than relying on a long email chain to tell the team whether work can start.
2. Send a focused intake form
The intake request should ask only for information needed to prepare the first stage of work. Pre-fill details already collected during sales so the client does not have to repeat them. A bookkeeping firm might ask for accounting software, reporting deadlines, access contacts, and the legal business name.
After submission, write the answers back to the client record or link the response from it. Send a confirmation that explains the next step instead of a vague "response received" message.
3. Collect documents with a checklist
A folder link alone does not show what is missing. Give the client a short named checklist and track every item as Requested, Received, Needs correction, or Approved.
For a working example of structured intake and missing-document visibility, see Flowmatic's mortgage client onboarding demo.
4. Run an internal readiness check
Do not book the kickoff the moment a form arrives. Create a review task for the owner responsible for delivery.
That person checks the agreement, payment, intake answers, required documents, scope, and any unusual promises made during sales. If something is incomplete, the record returns to a specific waiting status. If it is ready, the workflow opens scheduling and creates the initial delivery tasks.
5. Schedule the kickoff and set expectations
Once the owner marks the client ready, send a scheduling link or offer a small set of times. Include the meeting purpose, attendees, preparation required, and what the client will receive afterward. Update the client record when the meeting is booked and assign preparation tasks to named people.
6. Surface exceptions instead of sending endless reminders
Most completed steps do not need attention. The useful view is the exception list:
- Agreement signed but payment still pending
- Intake not submitted by the due date
- Required document missing or rejected
- Client ready but no kickoff booked
- Task overdue or missing an owner
- Automated message failed
Send reminders only while the related status remains open. Stop them when the client responds, and route replies or unusual cases to a person.
A realistic example: a two-person bookkeeping firm
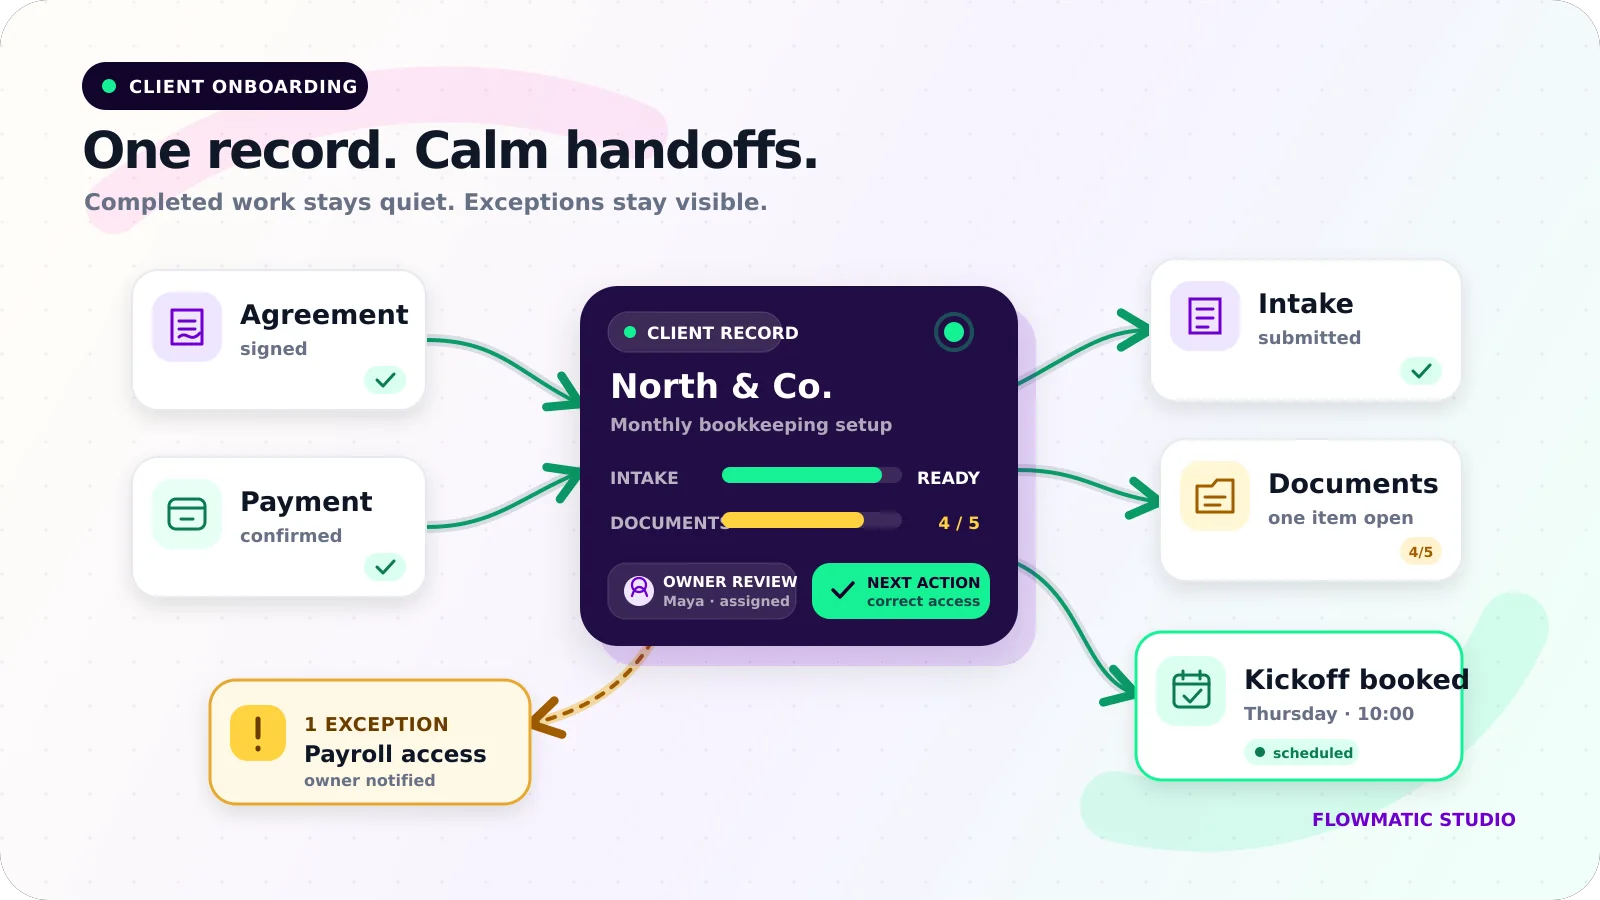
A client accepts a monthly bookkeeping proposal and pays the setup invoice. Those two events update one client record from New sale to Intake ready.
The client receives a pre-filled intake form and a checklist for prior reports, bank access, payroll details, and the main finance contact. Each received item updates the checklist. After two business days, the system sends one reminder listing only the missing items.
When everything arrives, the assigned bookkeeper receives a review task. She notices that payroll access is incomplete, marks that item Needs correction, and sends a personal note. The automated kickoff invitation waits.
Once access is confirmed, she marks the record Ready for kickoff. The scheduling message goes out, preparation tasks are created, and the owner can see the meeting date from the same client record.
The automation handles movement, reminders, and visibility. The bookkeeper handles judgment and the client relationship.
Start with the minimum useful version
Map one recent onboarding by listing every message, handoff, delay, and missing item. Then build only the path that occurs most often:
Agreement and payment confirmed → intake sent → documents checked → owner review → kickoff booked → exceptions visible
Test it with a sample client before using it on live work. Include a late payment, an incomplete form, a corrected document, a client reply, and a failed notification. Confirm that every open item has an owner and that reminders stop when the status changes.
Add branches only after the basic path works. Different services may eventually need different forms or checklists, but they can still share the same status logic and exception view.
A practical onboarding system should make one question easy to answer: what does this client need next, and who owns it?
If your onboarding still depends on checking several inboxes and chasing missing items by hand, request a Flowmatic workflow audit. We will map the handoffs and identify the smallest useful system to build first.
Fix the next onboarding bottleneck
Make every client handoff visible
Flowmatic maps your agreement, payment, intake, document, review, and kickoff handoffs, then identifies the smallest useful workflow to build first.
Request a workflow audit